
Android Resources Management
Posted on 14 Dec 2018
This is the ninth article of the Android Game Programming series. In this article, I will discuss how to manage resources in Android.
In Android applications, Java code calls internal project elements such as XML files, strings, numbers, images, and more. The best way to keep all these “values” available to the application is to place them in the project folder called res and manage them using the appropriate resource mechanism.
In this article, we have seen what the subfolders of the res directory are and what information they contain. Here we want to understand how to manage the application resources and how to use them in the code. In conclusion, we will see another mechanism of file management: the assets. All images and sounds of our video game will be put in an assets folder and loaded into memory using the Android Asset Management mechanisms.
How to invoke Resources
Resources are compiled in a binary format and indexed using a unique ID. These IDs are stored in a Java class, named R, auto-generated at each modification and visible in the folder of the Android project. The code:
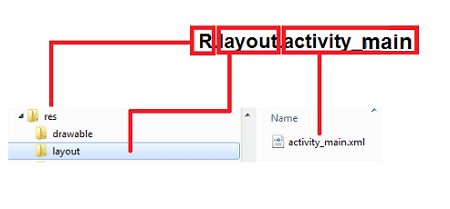
setContentView(R.layout.activity_main);
indicates that the layout of the activity is placed among the resources. In particular, each path inside the R class reflects a placement of resources in the res subfolders as illustrated in the photo below. Through their identifiers, the resources are accessible both from Java code and from other resources defined in XML.
in Java: trough R.resource_type.resource_name;
in XML: @resource_type/resource_name.
For example, the resource of type string and name appname can be retrieved, in Java, through R.string.appname or from other XML resources with @string/appname.
<string android:name="appname">Hello world!</string>
Make game multi-devices using the Resources
The hardware fragmentation in the Android world remains one of the most difficult obstacles to overcome for the programmer. In this, resources play a very important role. Observing a typical Android project we can see that among the internal folders to res some appear with “canonical” names (menu, values, layout) and others with “modified” names (drawable-hdpi, drawable-mdpi but also values v14, values-v11, etc.).

Photo from medium.com
This is because to the folder name you can append a suffix that represents the configuration of the device with which the resources contained can be recalled. If, for example, res/layout will contain the graphic structure of the various interfaces for any configuration, res/layout-land will contain layouts that can only be used when the device is in landscape mode. Other important modifiers are those that refer to the language of the device: values-it will be the resources for Italian devices, values-en for those in English, and so on. There is a very large collection of modifiers, all available on official documentation.
The images deserve a special mention. The modifiers applied to drawable folders (ldpi, mdpi, hdpi, and so on) are some of the acronyms that identify the densities of the displays. This density concept represents the number of pixels per physical area of the screen. Programming for Android, it is good to abandon the habit of measuring in pixels, using the dp (Density-Independent Pixel) as a unit of measurement of the graphic elements, a sort of “virtual” pixel independent of the density of the display that keeps intact the proportions between the elements of the layout as the density changes.
Assets
The official documentation lists all the resources type that can be used. There is also a resource “raw” type that can be placed in the res/raw folder. You can place there everything that does not fit in other folders. As an alternative to raw resources, there are the assets. These are outside the resource mechanism and must be stored in the project folder of the same name. They are neither compiled in binary nor labeled with a unique ID. Their use by the application will take place through a stream that can be requested to a Java class named AssetManager.
Load bitmap in memory from an asset
An asset is nothing more than a file (i.e. image or sound) loaded into memory and used by the application. In this exercise, we will see how to load an image in memory. Unlike the exercise in the previous article, we will not see anything special on the video, but it is essential to perform the exercise in the next article in which we will draw the image loaded on the screen.
In our case, in the assets folder, we will put all the images and sounds of our video game that will be loaded at its startup. To do this you will need to add a new method to the FileIO interface called readAsset. The implementation of this method will be based on the AssetManager class of Android that will find the files directly from the assets folder.
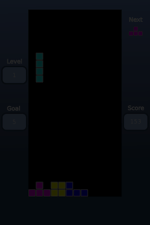
When Android Studio will create the videogame APK file it will automatically include this folder in the final package. It is important that the file names are all lowercase. First, create the assets folder under the main folder and copy the startscreen.png file you can get by downloading the code of this example here. Modify the FileIO interface by adding the readAssets method mentioned above.
public InputStream readAsset(String fileName) throws IOException;
Check out the implementation of this method in the AndroidFileIO class on github.com.
As you can see the opening of the file will be delegated to the Android class AssetManager that will provide the InputStream through which the data of the file will be read. To load the bitmap startscreen.png we modify the onCreate method of the MyActivity class by entering this code immediately after the call to setContentView.
As you can see, the bitmap is loaded from the asset startscreen.png and loaded into the Bitmap object which is the Android class representing a bitmap. The message that the bitmap has been loaded successfully should appear on the video of your mobile phone. In the next article, we will see how to draw this bitmap on the video.
To execute the code you can follow the procedure here. The source code for the exercise can be found here.

