How to transform your Kodi Media Center in a Game Platform
Posted on 28 Apr 2017
In this article, I would like to show you how to transform your Raspberry Kodi Media Center in a Retro Game platform.
Before you read this article I assume:
- you already built your own Kodi Media Center with Raspberry;
- you already configured it.
How to Install RetroPie
In order to create a Retro Game platform on your Raspberry Kodi Media Center, it is required you install the RetroPie software. RetroPie is an emulation station that allows playing games for several platforms like Mame, Nintendo 64, Nintendo SNES, and so on. The installation of this software is very easy.
Access to your Raspberry via ssh as described in this article and give the following commands to start the installation procedure:
mkdir /media/KODI/Programs/RetroPie
cd /media/KODI/Programs/RetroPie
wget https://raw.githubusercontent.com/mcobit/retrosmc/master/install-retrosmc.sh
chmod +x install-retrosmc.sh
./install-retrosmc.sh
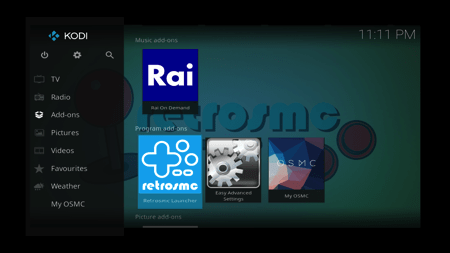
A text menu will appear in the terminal, choose the option Install Retrosmc. Several packages will be downloaded and it will require some time to complete, be patient. Once the download is completed choose Basic Install from the text menu. The installation procedure will require some time, be patient. When this operation terminates the text menu will appear again, install the RetroPie Launcher Add-On, in this way you can launch the emulation station easily from your Kodi menu using the remote control. By default, this add-on will be deactivated after the installation because it is not an add-on provided in the official Kodi Repository. To enable it to do the following steps:
- Go in Add-Ons->My Add-Ons ->Programs add-ons.
- Select RetroPie Launcher
- Select Enable.
Now the RetroPie Launcher will be visible in the Add-Ons menu of Kodi. To launch it select Add-Ons -> RetroPie Launcher.
For more details on the RetroPie installation on OSMC look at the official guide.
Buy Game Controllers
To play Retro Game on Kodi and Raspberry it is required to buy at least a game controller. I have two kids and to prevent them from arguing I decided to buy two Xbox compatible Microtech Game Controllers with a USB cable. In Italy, there are Chinese shops that sell very economic stuff and I bought them there for 12 EUR each. If your Kodi Media Center is built using the new Raspberry Pi 3 Model B you can also decide to buy a Bluetooth Game Controller because this model supports a built-in Bluetooth receiver.
Here a photo of my two Game Controllers attached to my Kodi Media Center. As you can see I use also two USB extenders to avoid opening the enclosure every time I want to attach the Game Controllers to the Media Center.
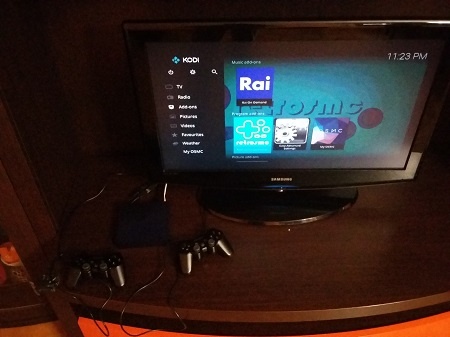
I tried to find these controllers on the Internet but I haven’t found them, however, I think whatever Xbox 360 Gamepad compatible works fine with Kodi and Raspberry.
Configure your Game Controllers
You have installed RetroPie and attached one or two Game Controllers, go on Add-Ons -> Retrosmc to start RetroPie. The Emulation station starts and a Welcome panel appears with the number of Gamepads detected. Hold a button on your gamepad to configure it.
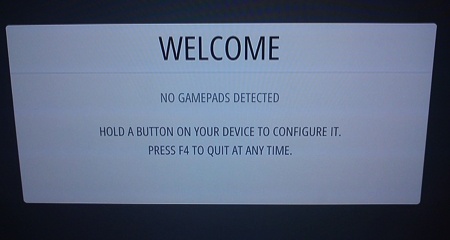
At the following page in the section Configure Controllers, you can find the instructions to configure your Gamepad. The following figure shows you how I assigned the buttons to my controller.
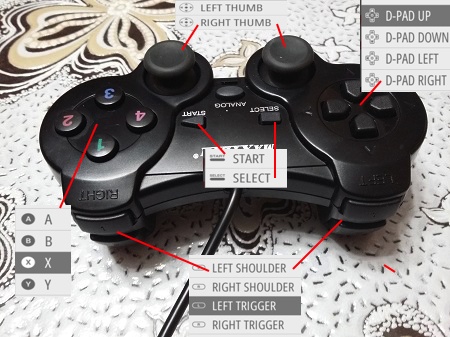
5 Important Things!!!
- The Left and Right Thumbstick have five movements: up, down, left, right, and press. When LEFT THUMB and RIGHT THUMB actions are associated with the press movements. When the Left Thumbstick move the actions are the same as D-PAD.
- LEFT ANALOG UP, LEFT ANALOG DOWN, LEFT ANALOG RIGHT, LEFT ANALOG LEFT are not reported in the figure. I associated them with Left Thumbstick once the ANALOG button is turned on. However, when I play video games I never turn it on.
- RIGHT ANALOG UP, RIGHT ANALOG DOWN, RIGHT ANALOG RIGHT, RIGHT ANALOG LEFT are not reported in the figure. I associated them to Right Thumbstick once the ANALOG button is turned on. However, when I play video games I never turn it on.
- On my Game Controller, 2 is A, 3 is B, 1 is X, and 4 is Y.
- If there are buttons that you cannot assign to anything on your game controller, simply hold down whatever button to skip it.
When you start to play games you need three important actions like:
- insert coin;
- start the game;
- exit from the game.
There is some buttons combination that by default provide you this functionality like:
- Select+Right to insert coin;
- Start to start the game;
- Select+Start to exit from the game.
For other button combinations, check the section Hotkeys of this page.
How to Install LR-MAME2010 Emulator
Retropie, by default, is installed with a set of emulators included two for Mame games: mame4all and lr-mame2003. However, I’ll suggest installing also the optional lr-mame2000 emulator, here the steps to do it.
From Emulation Station’s main menu click on RetroPie.
Select the menu RetroPie Setup, a text menu will appear.
Select the Manage packages -> Manage optional packages -> LR-Mame2010 to install the emulator. The operation will take some time and even if you have the impression that nothing is happening, be patient. Once the installation completes exit from the text menu. Then go back to the Emulation station main menu pressing the X button (button 1 on my controller). Select Start to have the Main menu appear on the screen and select Quit -> Quit Emulation station -> Yes to exit from Emulation station.
How to install and play Mame Game Roms
Mame Game ROMs are the most important games you should have on your Game platform. For Mame RetroPie has several emulators like:
- Mame4all, that is able to play Mame 0.37B5 romsets.
- LR_Mame2003, that is able to play Mame 0.78 romsets.
- LR_Mame2000, that is able to play Mame 0.139 romsets.
There are other Mame emulators available in RetroPie like Advance Mame, LR-MAme2014, etc. On this page, you can find the full list with the romsets supported.
Each game is basically an archive file (zip file for example) containing some files required to play the game. This archive is called “romsets” and it usually is compatible only with a single Mame romsets version. For example, you can find 0.78 romsets for the Bubble Bobble game and it can only work on the LR_Mame2003 emulator. Find a romset for a given game that works fine could be cumbersome if you do not follow the right approach that now I will explain to you.
Suppose you want to play Bubble Bobble and you have installed the three emulators above, the quickest way to find the right romsets is to look for a 0.37B5, 0.78, or 0.139 one. If you find the 0.78 you can play it with LR_MAme2003 emulators. However, some time could be difficult to know the version of a romset so the best approach is:
- Search the romsets for a given game with the exact version of one of your emulators.
- Copy it under /home/osmc/Retropie/roms/arcade folder.
- Repeat steps 1 and 2 for all your games.
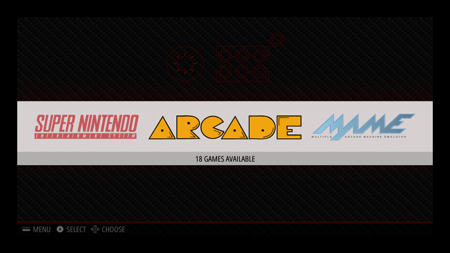
Go on Add-Ons -> Retrosmc to start RetroPie again. When the Emulation Station menu appears to select the Arcade option.
Select the game you want to play pressing the button A (button 2 on my controller). Before the game starts to play immediately the button X (button 1 on my controller), a text menu will appear where you can select the emulator you want to use to play the game.
Attention!!! This operation must be done once. When the game works fine with an emulator, the next time you launch it, it’s not necessary you select the emulator again, it will remember the latest one used.
Choose the right emulator using a try and error approach. As default emulator I suggest using mame4all, then if a game does not play with it you can select the specific emulator to run it.
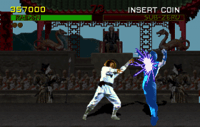
What games you can play with your Retro Game Platform?
At the following page, you can find a good list of games you can play with Mame emulators. There are other games that I like not reported in this article like Popeye, OutRun, Superman, and Gun Smoke. For Nintendo emulators, my favorite game is Super Mario Bros. Remember that most games are covered by Copyrights, make sure to have the rights to run them. More information on the subject here.

