How to Configure Kodi Media Center
Posted on 12 Mar 2017
In this article, I would like to show you how to configure your Kodi Media Center. I assume you already bought all the necessary components to build it and you’re media center is ready to be configured.
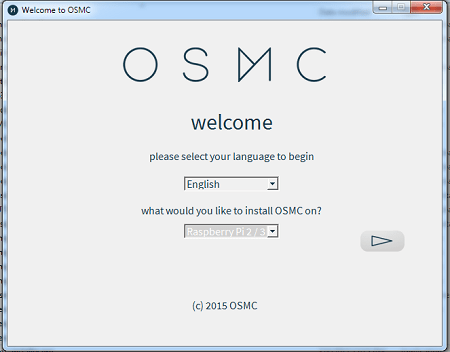
How to Install the OSMC Operating System
Download the OSMC installation software from here and launch the installer. Select the English language and the Device where you want to install OSMC. In your case, it is Raspberry 2/3 and clicks Next.
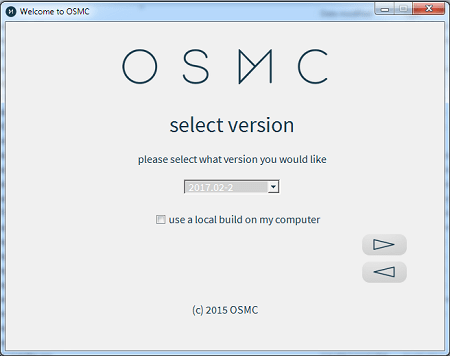
Select the latest version in the drop-down list and click Next.
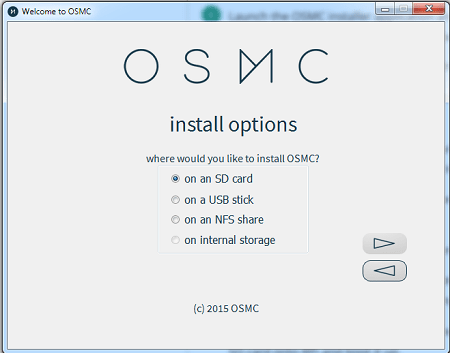
Select the device on which you want to install the Operating System and click on Next. In our case, the device is the SD Card.
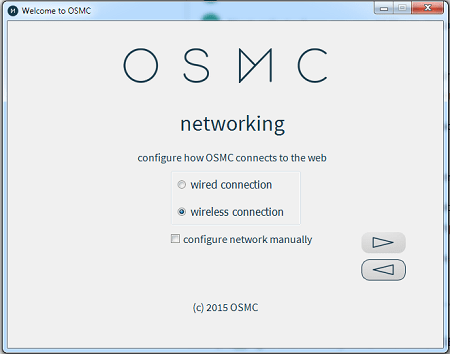
Select your network. In this tutorial, I assume you are using a wireless connection but if you are lucky enough to have an Ethernet cable next to the TV I suggest to use the wired connection since it is fastest.
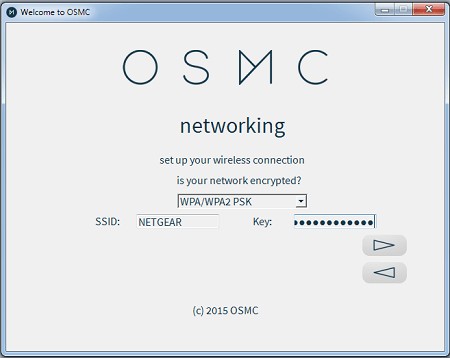
Configure your networking wireless parameters inserting the SSID, the encryption method, and the password. Usually, this information is the one you used when you configured your wireless router.
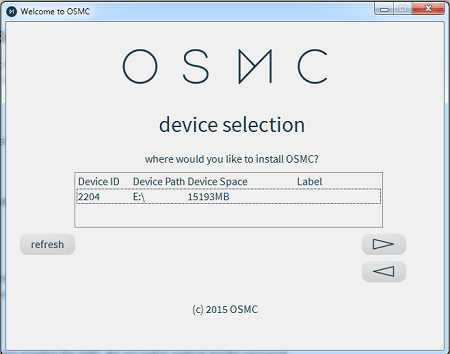
Select the storage where you want to install OSMC. You have to select the driver of your SD Card.
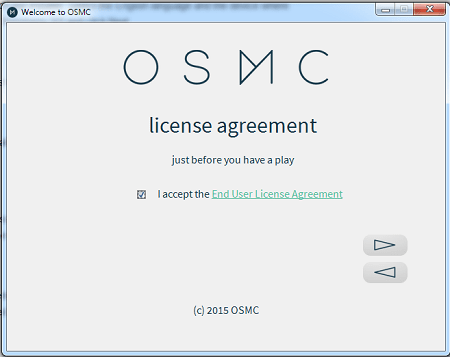
Accept the license term.
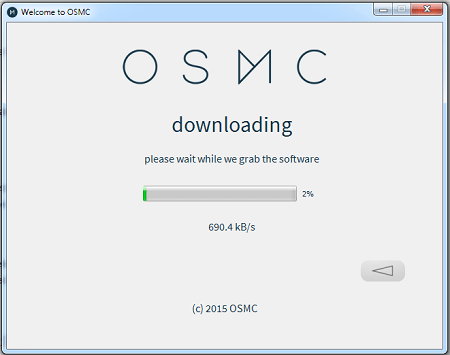
Wait until the SD Card is formatted. The installation process will ask you if you are sure you want to install OSMC on the device selected. Click OK.
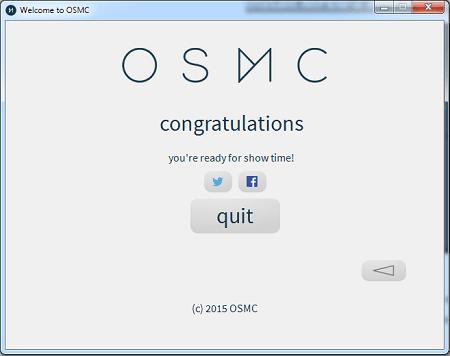
When the following screenshot appears the installation is completed.
After plugging in the memory card, WIFI stick (or Ethernet cable), and power adapter your system will start. Wait until the installation complete, then select language and time zone. Accept the default name for the device and leave the SSH service enable because it will be necessary to continue the configuration.
If the wireless networking is not recognized immediately use a long Ethernet cable to connect the Raspberry directly to the router so that you can use the wired connection in the meanwhile the wireless one is configured.
Select the Classic UI for Kodi 17.
Wireless Connection
If your wireless connection is not immediately recognized go on MyOSMC->Networking->Wireless and select Enable Adapter. Select the SSID of your network and insert the password. You can use your remote control since the letter to enter are few.
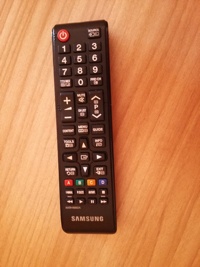
Remote Control and Yatse
In order to drive your Kodi Media Center, your normal remote control is required. Modern TV uses the CEC system that allows using one remote control for all the devices connected via HDMI. Make sure CEC is enabled (by default they are usually enabled) on your TV and if not, go on TV menu to enable it. I cannot report the steps here because it depends on the TV you are using but usually, no special configuration is required.

Install the Yatse app on your Android or iOS device. Yatse is a very powerful application that you can use as a remote control but also as a keyboard. Usually, with Media Center, the use of a keyboard is not frequent. In 95% of cases, you’ll use the remote control but there is a 5% where you need a keyboard. To avoid having it in your living room a better solution is to install Yatse on your phone and use it as a keyboard. It will communicate with your Media center via networking.
Once you installed Yatse click on Device->Manage Host and add a new Host. Insert the IP of your Media Center. If you do not know what it is, go on MyOSMC->Networking->Wireless and look for the Ip Address field.

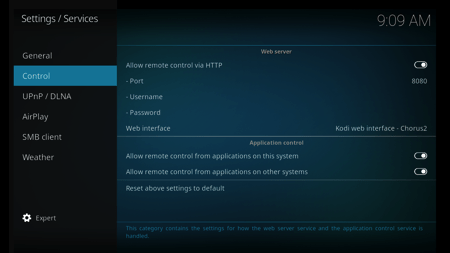
Yatse will detect automatically KODI and automatically will activate the remote control via HTTP. If this does not occur you can enable the remote control going on Settings->Services Settings->Control and activate the option Allow remote control from applications on other systems.
Now you are ready to control your media center also via Yatse.
Video Calibration
There is a lot of TV model on the market and the chance that after the installation the display fits perfectly on your TV screen is very low. For this reason, I suggest spending one minute to calibrate the video output on your TV. To do that, go on Settings->System Settings->Display->Video Calibration
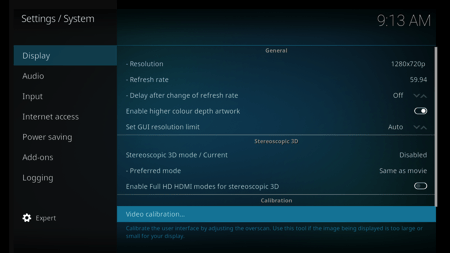
Adjust with your remote control arrows the top left corner, bottom right corner, the subtitles position, and the aspect ratio.
Access to your Raspberry via SSH with Putty and Filezilla
To continue the configuration it could be required to access your system via SSH (a network protocol) that allows you to open a Linux terminal on your Raspberry system and also a system to transfer the file on it. For this purpose, I suggest installing on your Windows computer Putty and Filezilla.
If you are a Mac or Linux user you do not need putty, you can simply use the ssh program usually available by default on your system. To access the Raspberry via SSH you need an IP address, a user id, and password. You can see the Ip Address going on MyOSMC->Network->Wireless the field IP Address. By default, the user and password are osmc/osmc.
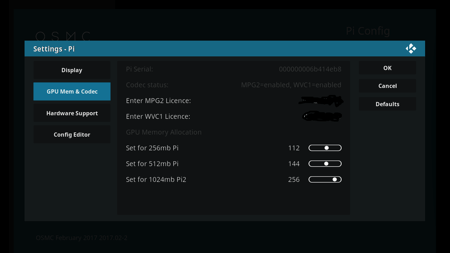
Install MPEG-2 and VC1 video codecs
By default OSMC on Raspberry allow you to watch the video in H.264 up to 1080p. In order to decode and play MPEG-2 and VC1 video files using hardware acceleration, you will need to purchase codec licenses from the Raspberry Pi foundation. I guarantee you that if you follow the following instructions you’ll be able to watch a lot of movies. This procedure will cost you a few dollars but it worth it.
- Purchase MPEG-2 and VC1 codec license keys.
- You will receive the license key through your email within 72 hours
- In OSMC, go to My OSMC > Pi Config > GPU Mem & Codec
- Enter the license key from your email to MPEG2 and/or WVC1 license under the Codec status. You can use Yatse here to enter the value.
- Reboot the system
To watch MPEG-2 and VC1 encoded files you can use transcoding software like Plex but you’ll need a separate server and a lot of configuration. The procedure I described to you here will save you a lot of money and time.
Configure /boot/config.txt
The file /boot/config.txt is one of the most important files in OSMC. Default values usually should work for the majority of the hardware, however, my suggestion is to try some changes. If you see Linux shutdown messages out of the screen try to remove the disable_overscan=1 option and add the overscan_scale=1.
disable_overscan=1
overscan_scale=1
This configuration will be useful also for the Retro Game platform in order to have the Emulation station screen correctly visualized on the TV video.
Configure External HD to store your media files
The goal of a good Media Center is to watch movies and TV Series but also show Pictures, play Music, and much more. For this reason, huge storage for media files is required. The best option is to store your file on a Network Attached Server (NAS) but usually, this solution is too expensive. For this reason for our Media Center, I decided to use an external drive. In this section, I’ll explain how to configure it.
Access to the Raspberry via SSH.
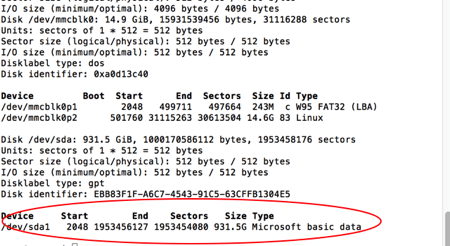
Give the fdisk command to get the device name of your HD:
fdisk -l
in my case, this name is /dev/sda1.
Format the HDD with an EXT4 filesystem using the following command:
sudo mkfs.ext4 /dev/sda1 -L <label_volume>
where <label_volume> is whatever string you prefer.
You can reboot the system and KODI automatically will mount the HD on /media/<label_volume> folder. I used KODI as label name and from this moment I’ll assume, in my articles, you have HD mounter under /media/KODI. I suggest to create the following folders under /media/KODI:
- /media/KODI
- Movies
- TVShows
- Programs
- Music
- Pictures
- Video
- eBooks
Copy your Media Files
Using Filezilla start copy your media files on your HDD. Copy the Movies in /media/KODI/Movies, your TV Series in /media/KODI/TVSeries. Once this task is done you are ready to transform your KODI in your own Netflix.
External Resources
To increase your knowledge about Kodi Configuration I suggest you read the following two tutorial:

