
How to install Youtube Add-on on your Kodi Media Center
Posted on 24 Mar 2017
In this article, I would like to show you how to install a Youtube add-on on Kodi. This add-on is one of the most important for Kodi media center because it allows you to watch Youtube videos on your TV.
Install Youtube Add-on
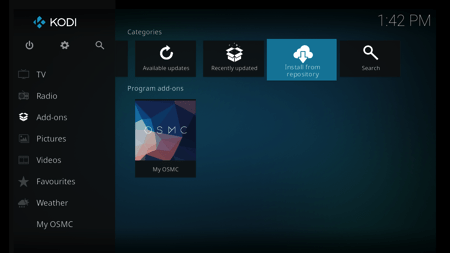
Starting from the Kodi home page select from the main menu Add-ons -> Install from the repository.
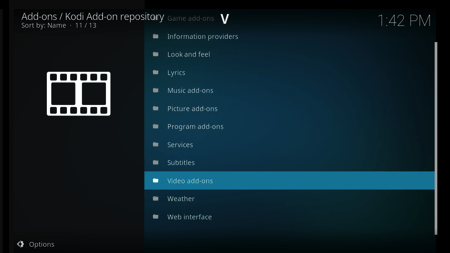
Select Video Add-ons.
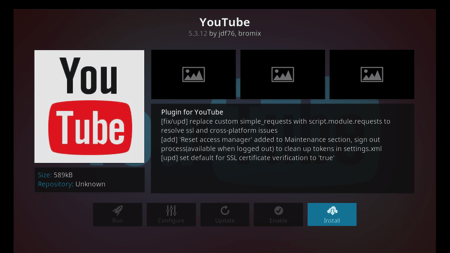
Select the Youtube Add-on and install it.
How to Configure Youtube add-on
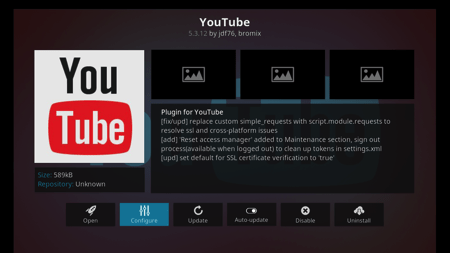
Once Youtube is installed you need to configure it. From the Youtube plugin page, click on the Configure button.
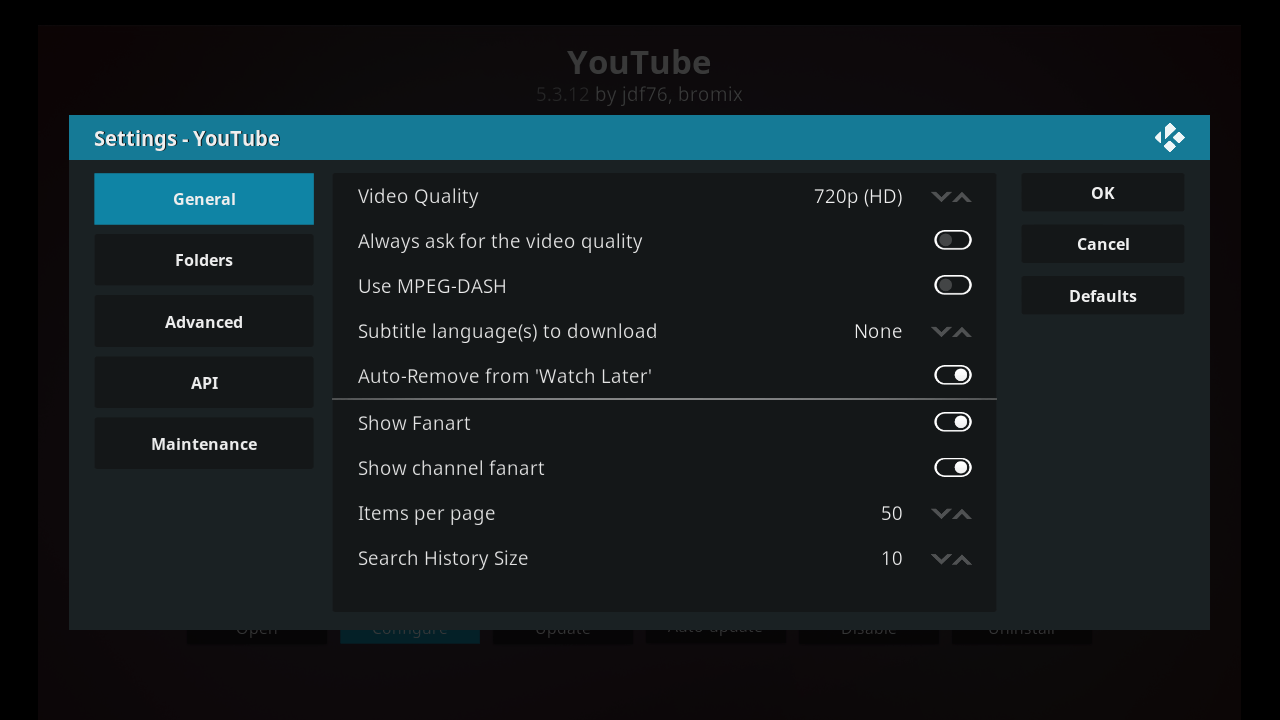
A configuration panel appears with 4 tabs: General, Folders, Advanced, and API. In the General Tab, make sure Video Quality is set to 720p and the options: Show Fanart, Show Channel FanArt; are enabled.
In Folders tab, make sure all options are enabled. However, later when you get familiar with this add-on you can select the Youtube menu to show.
By default, the add-on use default Youtube API Keys. These Keys are shared by all the KODI users around the world and since Google set a limit on the number of queries that can be executed each day, it easy that this limit is reached very quickly. In fact, the KODI forum is full of support request about “daily limit exceeded”.
If you want to avoid this issue create your own API key, API id, and API secret and enter them in the API tab after you enabled the Personal API Keys. In the next section, I’ll explain to you how to create these keys.
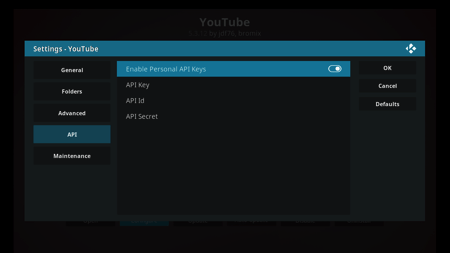
To type these strange numbers in Kodi you have two alternatives. The first one is to use the graphical interface above and type the data with Yatse. An alternative approach is to access the Raspberry terminal with Putty via SSH and edit the file ~/.kodi/userdata/addon_data/plugin.video.youtube/settings.xml inserting the information in the following way.
youtube.api.enable=true
youtube.api.id=111111111111-aaaaaaaaaaaaaaaaaaaaaaaaaaaaaaa
youtube.api.key=AAAAAAAAAAAAAAAAAAAAAAAAAAAAAAAAAAAAAA
youtube.api.secret=XX-YYYYYYYYYYYYYYYYYYYYYY
After the keys configuration, you have to log in with your Google Account. Access the Youtube Add On following the path Add-On -> Youtube and select Login. Kodi will ask you to access the web page youtube.com/activate and insert the code that appears on the TV screen. The Youtube Add-On will require to repeat this procedure twice, it is not a bug, this is how the addon works. Repeat the procedure twice and restart Kodi.
Create Youtube API Keys
In this section, I am going to explain to you the procedure to generate your own Youtube API keys. The information in this section comes from the following Kodi forum thread. I decided to replicate them on this article because I want to add a few important details.
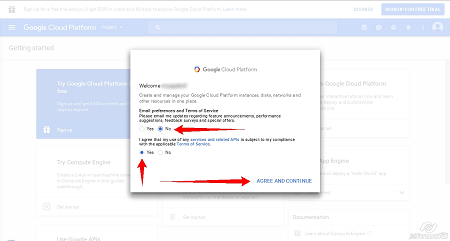
Access to the Google Cloud Platform and do the following:
- Select your email preference (Yes or No – it does not matter)
- Select Yes to agree to the Terms of Service.
- Click Agree and Continue
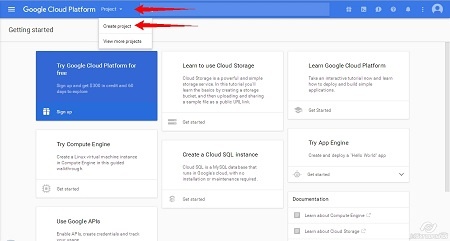
Ignore any offers to “Sign up for a free trial” and “Try Google Cloud Platform for free”. It is not required. You have to create a Project with the following steps:
- Select Project > Create Project > Enter Project Name (the name does not matter) > Create
- Wait until the next page loads with the New Project that you just created.

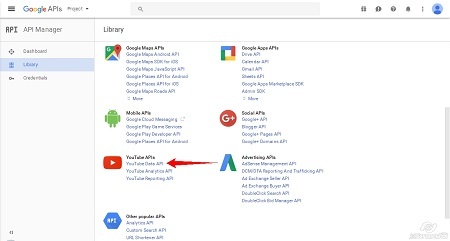
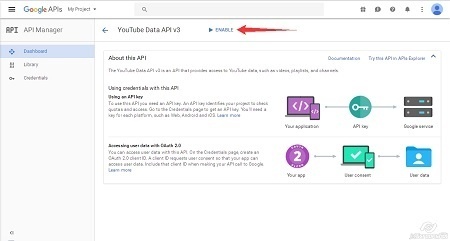
Now you have to enable Youtube Data API. To do that go in the API Library and select in Youtube APIs section the Youtube Data API link and select Enable.
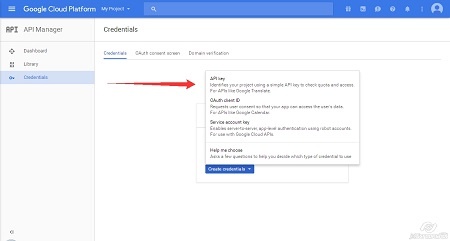
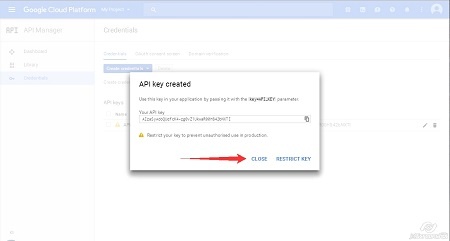
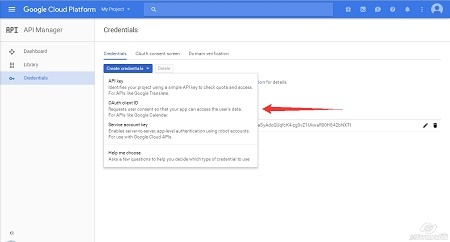
Create now your API Key going in the Credentials page and selecting Credentials -> API Keys. Copy and Save your key to insert it later into Kodi. Click Close.
On the same page select Create Credentials -> OAuth Client ID, then Select -> Configure Consent Screen.
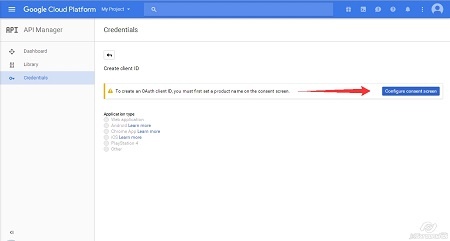
Enter a Name in “Product name shown to users” (the name does not matter). Click Save and wait for the next page to load with the OAuth Client ID screen, then Select Other > Create. Copy and Save the Client ID and the Client Secret.
Now you have your API Key, API ID and API Secret you can insert into Kodi as explained in the previous section.
Attention!!! Very Important.
The Google Cloud Platform provides the API ID in the format:
- 111111111111-aaaaaaaaaaaaaaaaaaaaaaaaaaaaaaa.apps.googleusercontent.com
It’s important that you remove the string .apps.googleusercontent.com and insert in Kodi only the value:
- 111111111111-aaaaaaaaaaaaaaaaaaaaaaaaaaaaaaa
External Resources
In this last section, I am going to share with you some important links that will be very useful in the future. The first link is the official thread on Kodi Forum to get support on this add-on.
The second link is the official Github repository of the Youtube add-on. Usually, this plugin is on the official Kodi repository and you can install it directly from it. Sometimes it could have problems, in this case, it is more convenient to download the latest version of the plugin from this repository and installs it as a zip file.

