![]()
A Step by step Amazon Relational Database Service tutorial
Posted on 26 Jul 2021
This is a step-by-step Relational Database Service tutorial to show you how you can easily create a database with the Amazon platform. In the previous article, I showed you the theory behind the Relational Database Service (RDS), here I will show you how to put those concepts into practice.
How to Create a MySQL database
Create the MySQL database
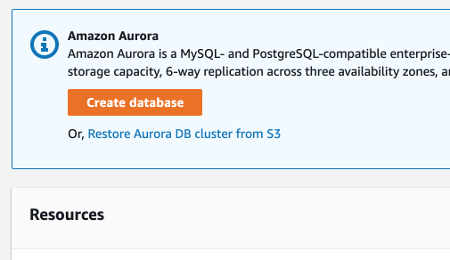
From the Management Console search bar, type the word “RDS” and select the Managed Relational Database Service. Click the orange button Create database.
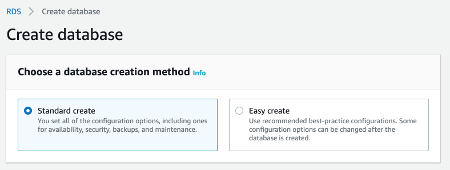
The RDS service provides two ways to create a database, an easy way with very few options and a standard way where you can configure every detail. Select the Standard Create radio button.
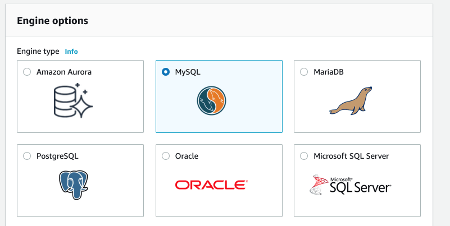
In the Engine Options, select the MySQL database engine. MySQL is eligible for free-tier so this tutorial will cost you no money.
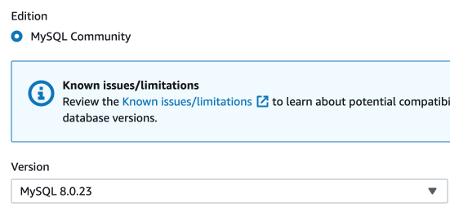
Choose the latest MySQL version.
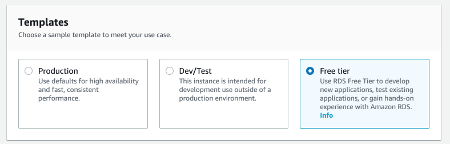
Now you can choose to deploy a production-ready, a dev/test database, or one eligible for free-tier. Since this is just a demonstration I suggest you select the Free-Tier radio button.
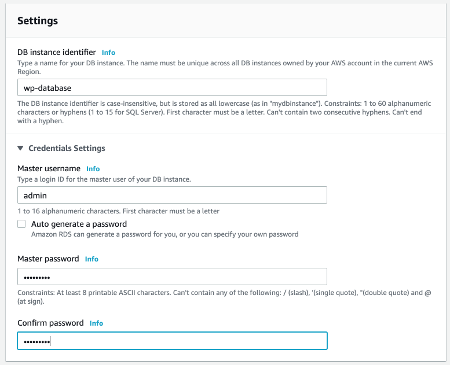
You can insert the name and the credentials of your database.
Configure the database credentials
Now you can select the DB Instance class. Basically, this is the EC2 instance type on top of which the database is deployed. Since we are using the Free-Tier the only EC2 instance we can use is the t2.micro that here is called db.t2.micro.
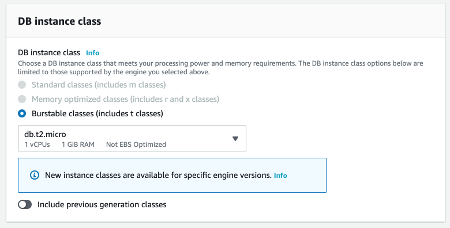
Configure the database hardware
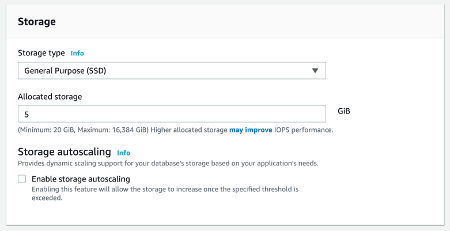
Amazon RDS allows you to select the storage that will store your database. For our demo, a generic General Purpose SSD disk of 5 Gb is enough.
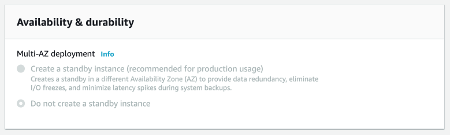
The RDS service allows you to create a Multi-AZ configuration, however, in the Free-Tier this option is disabled. For our purpose, a Single-AZ deployment is fine.
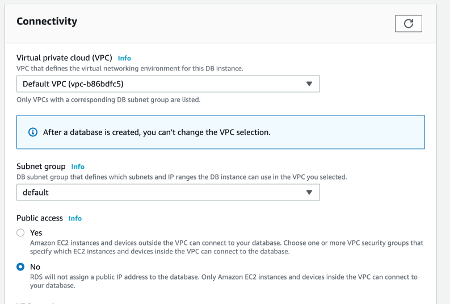
You can configure the Connectivity for your database. For example, you can choose the VPC and Subnet where to deploy the database. moreover, you can decide if the Subnet should be public or private. In a typical scenario the EC2 instance application will live in a public subnet while the database will live in the same VPC but a private Subnet.
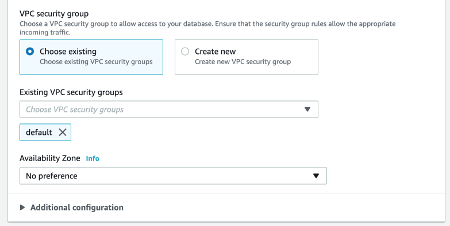
Configure the database security and authentication
You can declare Security Group to allow only traffic coming from a given IP or another Security Group to access the database. This option is particularly useful in the typical scenario to allow only the application EC2 instance to access the database. This is another security best practice to avoid hacking your database instance.
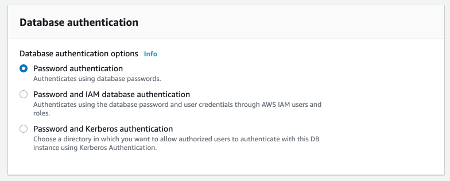
In the previous article, I mentioned two authentication methods on RDS: password and IAM; There is a third method called Password and Kerberos authentication, however, to make things simple just select the Password authentication radio button. Click the Create Database button.
Explore your new MySQL Database
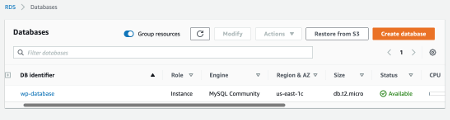
In the Databases dashboard, you can see the new database. You can click on it to see details about it.
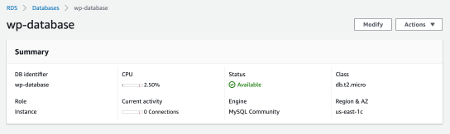
You can see the Summary with information about the database name, the status, the hardware, the engine, region, and so on.
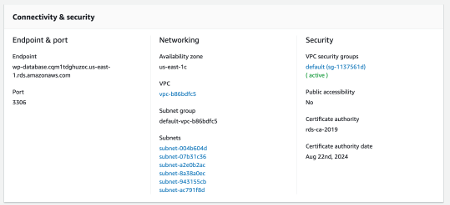
There is information about Connectivity & Security and much more.
Conclusion
In this article, I showed a step-by-step Relational Database Service tutorial to easily create your next MySQL database on the Amazon platform. The previous article and this tutorial complete our discussion about the Amazon RDS service. For more details, you can check out the official documentation.

