
Amazon EBS Tutorial: Step by step Guide for Beginners
Posted on 01 Jun 2021
In the previous article, I talked about Amazon Elastic Block Storage (EBS) service and this is a hands-on tutorial the will help you to learn how to use this service.
How to create an EBS volume and attach it to your EC2 instance
There could be a scenario when you have to attach a second EBS volume to your EC2 instance. A typical scenario is when you run a database server and you want to use different storage for your data. This approach is particularly useful because you can backup your storage using snapshots.
Create the Amazon EBS Volume
In the left menu of the EC2 dashboard select the Volume link in the Elastic Block Store section.
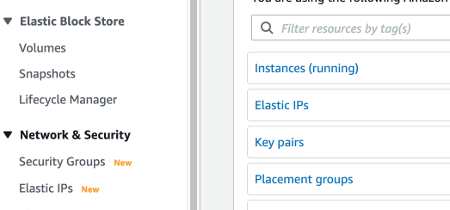
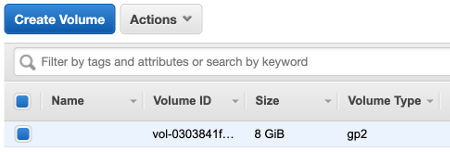
You’ll see the 8Gb volume attached to your EC2 instance. To create a new volume click on the Create Volume button.
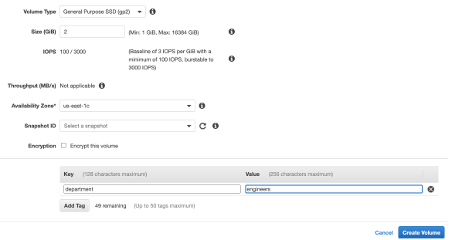
You can specify the size of your disk. Remember that you only have 30 Gb for your Free Tier and since 8 Gb are already in use you can allocate a max of 22 Gb at no cost. You can also assign tags to your volume. Click on the Create Volume button.
Your volume is now available but not yet attached to your EC2 instance. So, for the moment, it is available but not usable by your instance.

Attach the EBS Volume to the EC2 Instance
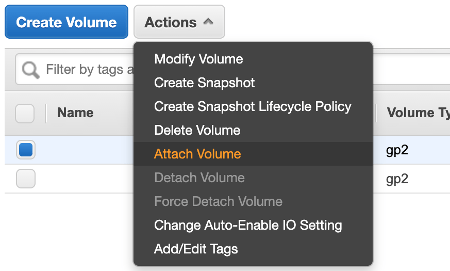
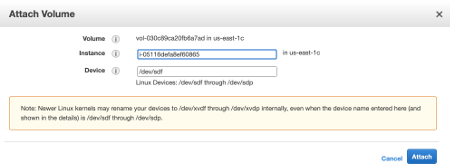
Select the volume and click on the Action->Attach Volume menu.
Select your EC2 instance and click the button Attach.
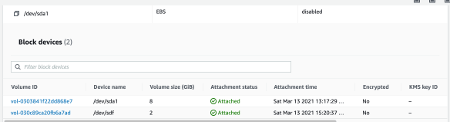
In the Block devices dashboard, you can see the new volume attached to your EC2 instance. You can now mount it on a folder.
Mount the EBS Volume in Linux
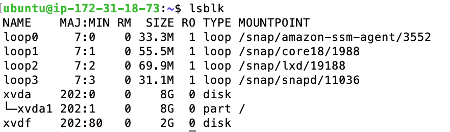
In order to mount your volume on a folder, you need to know its device name in Linux. You can do that by running the command lsblk. In the image, you can see its name is xvdf.
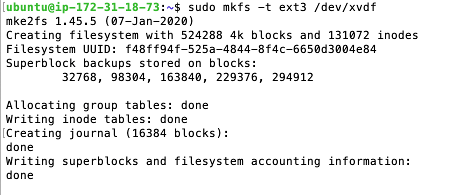
Format the volume with whatever filesystem. For this tutorial, I used the ext3 filesystem using the following command:
sudo mkfs -t ext3 /dev/xvdf
Now you can mount the volume on a folder with the command:
sudo mount /dev/xvdf /home/ubuntu/folder/
![]()
To verify the volume is correctly mounted run the mount command.
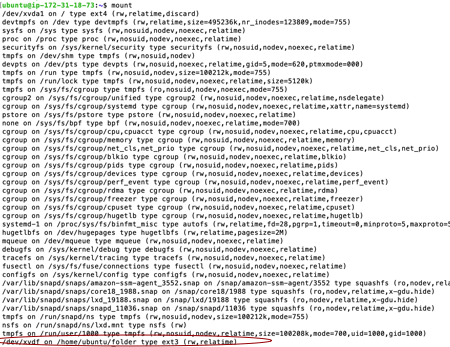
You can start using your volume in the /home/ubuntu/folder.
Move EBS volume cross AZs with Snapshots
In the previous article, I discussed in theory how to move EBS cross AZs using Snapshots. In this section, I will show you how to do it in practice.
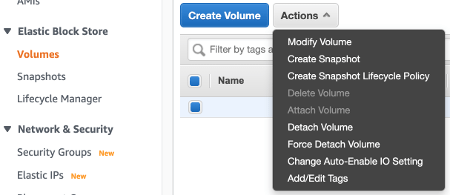
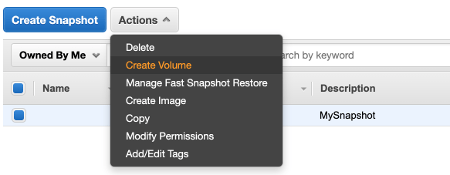
Select the Volume link in the Elastic Block Store section of the left menu in the EC2 dashboard. Select the volume of your EC2 instance, click the Actions button and select Create Snapshot.
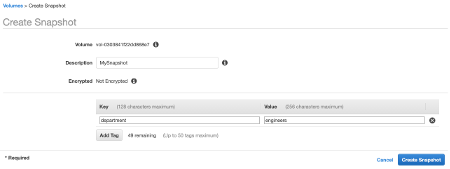
Choose a name for your snapshot and one or more tags to classify it (this is optional). Click the Create Snapshot button.
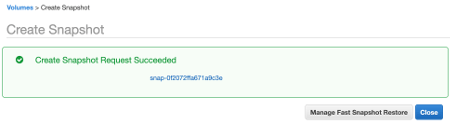
Your snapshot is created. You can see it by selecting the link Snapshot in the same menu section above. The snapshot will be visible in all the AZs of the Region.
Now you can create a volume in another AZ using this snapshot. Select the snapshot and click Actions->Create Volume button.
Insert the size of the volume that should be greater than the snapshot’s size. Insert the new AZ (different from the previous one) where create the volume. Click the Create Volume button.
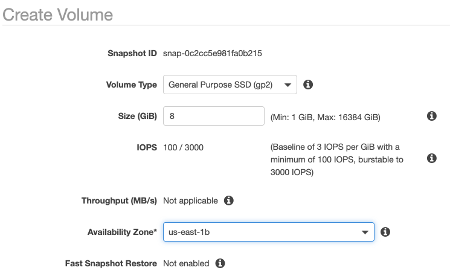
You can see the new volume in a different AZ us-east-1b.
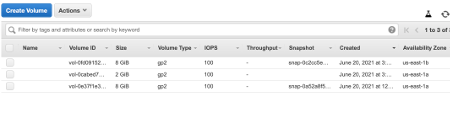
You can attach the volume to an EC2 instance in us-east-1b AZ.
Move EC2 instance in another AZ
Move EC2 instance in another AZ with Snapshots
The procedure to move an EC2 instance in another AZ of the same region is similar to the procedure to move EBS volume. You need to create a snapshot of the boot volume with your customization, then create an Amazon Machine Image (AMI) from that snapshot. You can see the procedure to create the snapshot in the previous section.
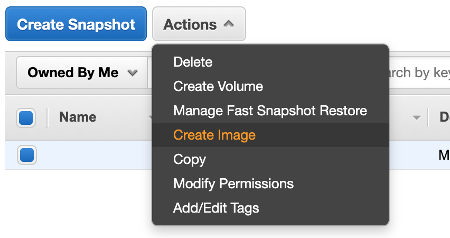
To create an AMI from the boot volume snapshot you simply need to select it and then click Actions->Create Image on the Snapshot web page. You can assign a name to your image.
Once the image is created you can see it by clicking the link Images->AMIs in the left menu. AMI has regional scope so it is visible in all the AZ.

At this point, you can create the EC2 instance from this API as shown in the first section of this article. In order to create the EC2 instance from your own AMI in Step 1: Choose an Amazon Mchine Image (AMI) page, select the tab MyAMI.
If your EC2 instance has more volume attached to it, you can create a snapshot from them and recreate the volumes in the new AZ as shown in the previous section. Then you can attach them to the new EC2 instance.
Move EC2 instance in another AZ without Snapshots
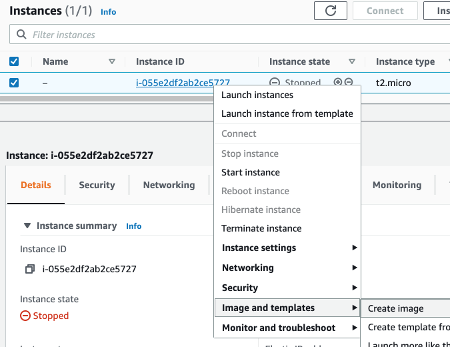
There is an easier method to create an AMI from an EC2 instance. You can simply go to the EC2 dashboard and stop the instance. Then you can right-click on it and select Image and template->Create image menu. In this way, the AMI will be automatically created from the boot volume without the need to create a snapshot first.
Conclusion
In the previous article, we talked about EBS and EFS storage from a theory point of view. In this article, we saw how to use all these concepts in practice.
* Feature image from https://data-flair.training

