A Step by step tutorial to create your first Elastic Load Balancer
Posted on 29 Jun 2021
In this article, I want to show you how to create your first AWS Elastic Load Balancer. Load Balancers are an essentials tool to improve the availability and scalability of the applications running on EC2 instances.
Create your Application running on two EC2 instances
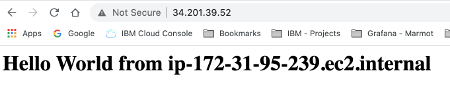
First of all, create an EC2 instance with a web server running a Hello World application as shown in this tutorial. If everything works properly you should enter the EC2 public IP address in the browser address bar and show a “Hello World” message with the private IP of your instance.
AWS platform allows you to easily duplicate your EC2 instance by simply right-clicking the EC2 instance in the EC2 dashboard and selecting the menu Image and template -> Launch more like this.

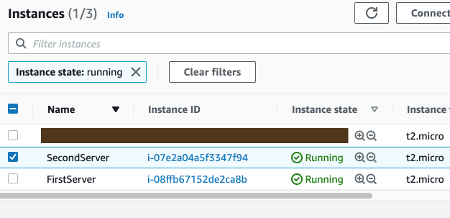
You should see two EC2 instances running in the EC2 dashboard. If you enter the IP of the second EC2 instance you should see a second “Hello World” message with a different IP. This IP later will help you to understand which EC2 instance will reply to your request.
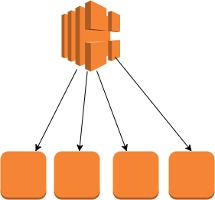
Now you can create the Load Balancer that will live in front of your EC2 instances and will forward the requests to one or another to split the workload across them.
Create the Application Load Balancer
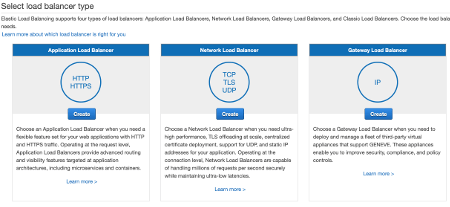
In the EC2 dashboard select the Load Balancers item from the main menu. Then select the Create Load Balancer button.

You can choose to create one of the three load balancer types available: classic, application, or network. Select the Create button for Application Load Balancer. This load balancer works fine with HTTP/HTTPS applications like our “Hello World”. For more details about the features of these Load-Balancers read the previous article.
Configure the Elastic Load Balancer
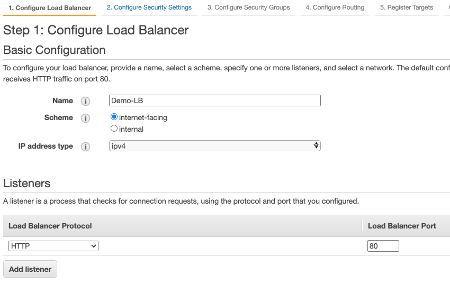
Once you decided on the Elastic Load Balancer to use you need to configure it. Insert the name of the load balancer (i.e. Demo-LB) and leave the default Scheme internet-facing in order to make it accessible from the Internet. Leave also the default IP address type ipv4. As you can see, this load balancer, by default, uses an HTTP listener. When it receives traffic on 80 port it automatically redirects the request to one of the EC2 instances registered in the Target Group.
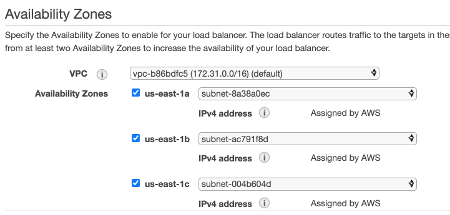
You can choose to add the fault tolerance to the load balancer itself. If you work with a single load balancer you’ll be affected by a single point of failure and this compromises the availability of your application. Amazon AWS allows you to replicate the load balancer across multiple AZ to improve its availability. Leave the default of 3 AZs.
In the following article, I talked about Security Group as a way to protect traffic incoming or outgoing to an EC2 instance. In this other article, I explained how to use them in practice. Security Group should be configured on Load Balancer as well in order to allow the incoming or outgoing traffic. For example, in this tutorial, in order to allow HTTP traffic, is fundamental to allow incoming traffic on port 80. It is not necessary to create a new Security Group, you can use the same used for EC2 instances.

Create the ELB Target Group and register the two EC2 instances
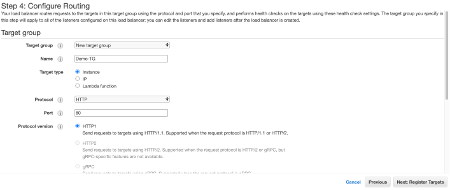
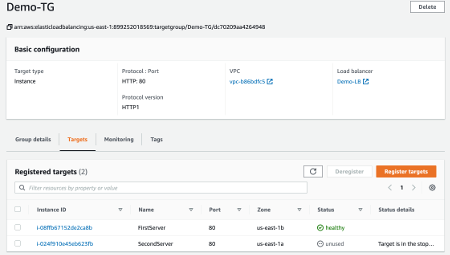
The application load balancer listens on port 80 and redirects the traffic to the EC2 belonging to its Target Group. You need to create now the Target Group and insert the two Ec2 instances in it. Insert a name for the Target Group and leave all the default settings.
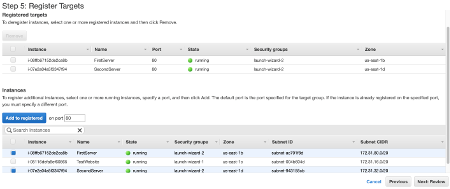
Add the two EC2 instances to the Target Group.
Review all the settings and click the Create button. You need to wait a while to let AWS provision the Load Balancer.

How to test the Application Scalability
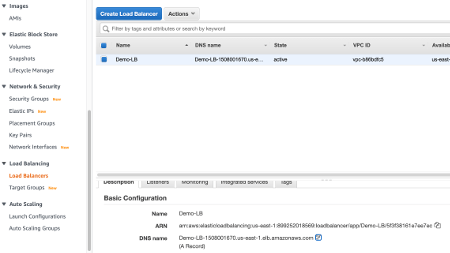
Once the Application Load Balancer is created you can select it and in the DSN name field, you can find the hostname to insert in the browser address bar.
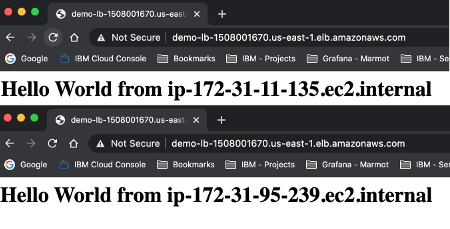
If you click repeatedly the browser Reload button you’ll find that the two EC2 instances will reply alternatively. You just tested that the workload is split equally on the two EC2 instances.
How to test the Application Availability
In order to test the availability of the application, you should verify what happens when an EC2 instance crash. You can simulate it by stopping manually an EC2 instance.
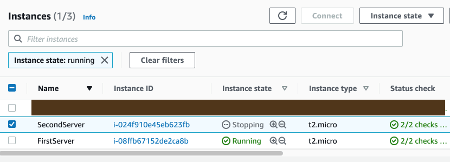
If you go on the load balancer Target Group you’ll notice that the load balancer health check detects that one instance is down and it redirects all the traffic to the other EC2 instance. In fact, you’ll see always the same “Hello World” message coming from the same IP.
Conclusion
In this article, I talked about Elastic Load Balancers and how to use them in practice. In particular, our tutorial shows how to use an Application Load Balancer. However, things are not really different if you use a Network Load Balancer that working at layer 4 of the IP stack and offers better performance. This is a good starting point to start using this tool on the Amazon platform. If you want more information refers to the official documentation.

