EC2 Auto Scaling Group Tutorial for Beginners
Posted on 05 Jul 2021
In this article, I’ll show you how to create an EC2 Auto Scaling Group to automate availability and scalability and let your application automatically adapt to workload changes.
In a previous article, I explained what availability and scalability are and how to increase the availability and scalability of an application using multiple Ec2 instances and a load balancer to balance the traffic. Let’s see now how to automate the EC2 provisioning using Auto Scaling Groups.
Create and configure the EC2 Auto Scaling Group
Create the Ec2 Auto Scaling Group
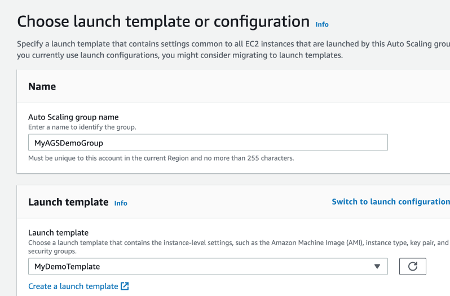
Before beginning, create a Launch Template for your EC2 instances as explained here. Then access the EC2 dashboard and from the left menu select Auto Scaling Groups. The following screenshot appears, click on the Create Auto Scaling Group button.
Insert a name for your Auto Scaling Group (i.e. MyAGSDemoGroup) and select the previously created Launch temple. Then click the Next button.
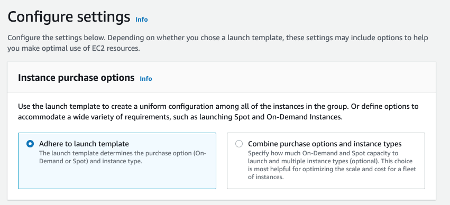
In the Instance Purchase options panel, select the Adhere to launch template radio button.
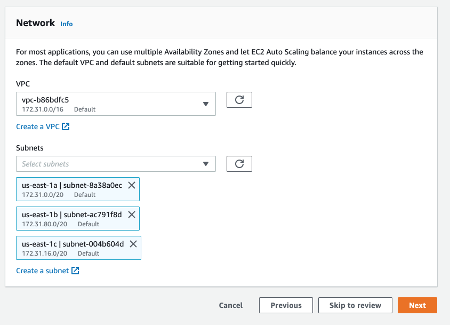
In the Network configuration panel, leave the default VPC and select three subnets for your Auto Scaling Group, one for each AZ. We are going to create up to three EC2 instances, one for each AZ. This is important from an availability point of view. After that, click the Next button.
Configure the Load Balancer
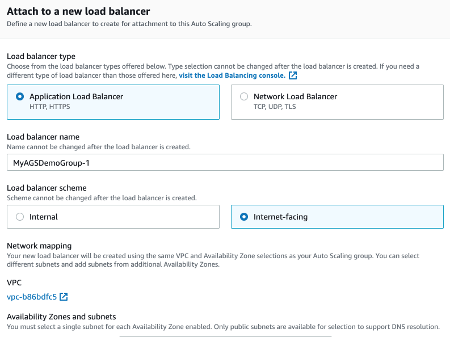
First of all, select the radio button Attach to a new load balancer in order to create a new Load Balancer. Then select the radio button Application Load Balancer and leave the default name. By default, AWS creates an internal load balancer not accessible from the Internet. To make it accessible from the Internet select the radio button Internet-facing.
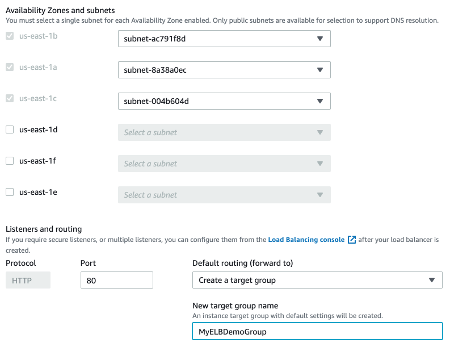
Leave the default subnets for Load Balancer availability. Then select the combo box option Create a target group and leave the default name for it. The Target Group is simply the set of EC2 instances to which the request will be forwarded.
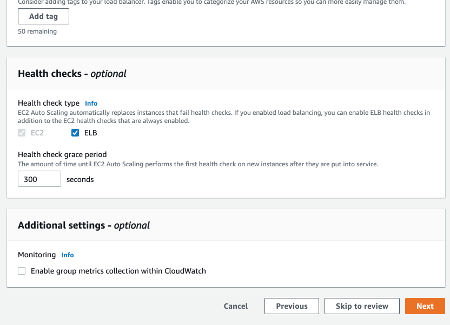
Auto Scaling Group has its own health check for EC2 instances, however, you can add the ELB health check as well. Click the Next button.
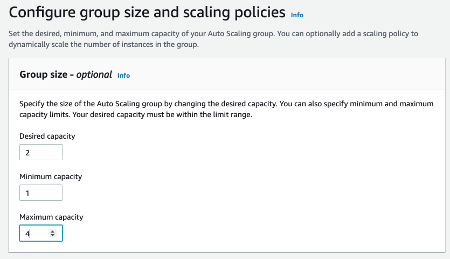
Configure Group Size and Scaling Policies
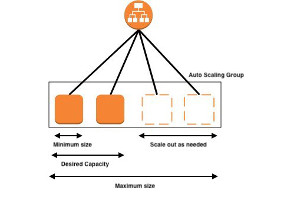
Now you have to decide the minimum, maximum, and desired number of Ec2 instances in the Auto Scaling Group. ASG tries to keep the desired value, however, depending on the workload it can decide to increase or decrease the number of Ec2 instances in the range included by minimum and maximum.
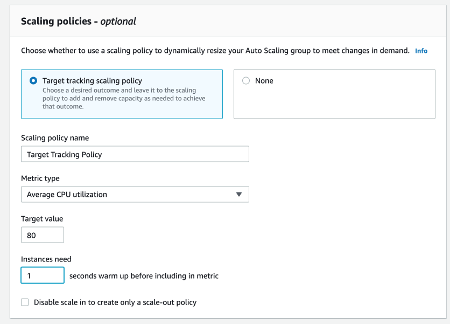
For automatic scaling policies, you have to select the Target tracking scaling policy radio button because you can select the metric (i.e. CPU) and threshold (i.e. > 80%) that affect the scaling in or out.
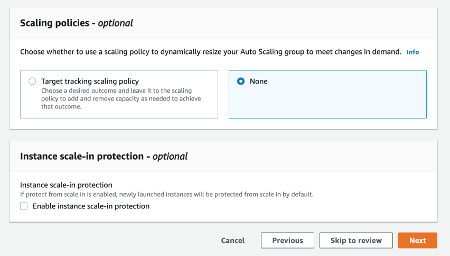
However, test automatic scalability is not an easy task and you should have a workload that is able to scale in or out the application. Since here we are only interested in how Auto Scaling works, we select the None radio button and we will scale in and out the application manually. Then click the Next button three times (skip the notification and tag pages).
Review the inserted data and click the Create Auto Scaling group button.
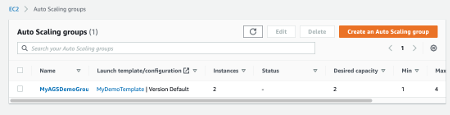
What happened behind the scene?
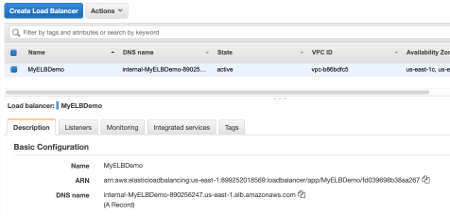
Behind the scene, a number of EC2 instances equal to Desired Capacity will be created. In front of them, there will be an application load balancer. The following three images show the Auto Scaling group, the two EC2 instances, and the load balancer.
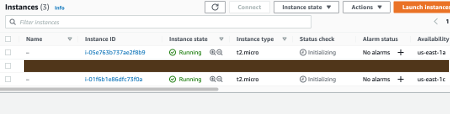
In the description of the load balancer, there is the DNS name to use to access the application. The rest is similar to what we have discussed in this article.
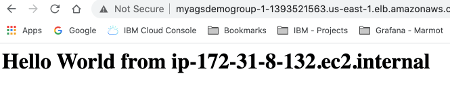
You can test your application by inserting the DNS name in the browser address bar.
Failover Scenario
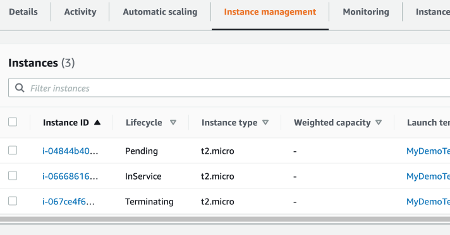
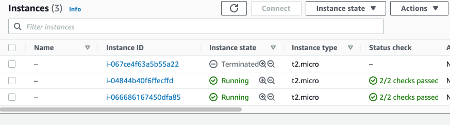
Now we can test the auto-scaling provisioning in the case an EC2 instance fails. Let’s terminate an EC2 instance going in the EC2 dashboard, selecting one of the two EC2 instances and select Instance state -> Terminate. You can notice the Auto Scaling group try always to keep the desired state up and running, so it will start a new instance.
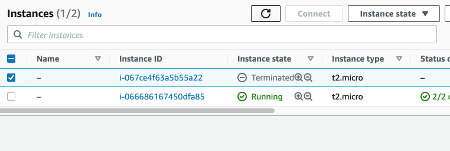
Let’s wait until the new instance will be up and running.
You can notice now you have two EC2 instances again.
How to scale your EC2 group
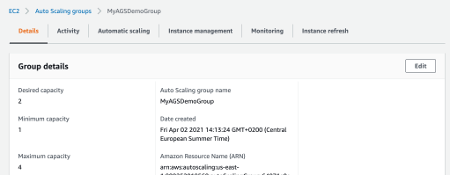
If you manually change the desired capacity, the Auto Scaling group automatically manages the Ec2 instances to have that exact number. From the EC2 dashboard select the Auto Scaling group menu, then click on your Auto Scaling Group, and in the Detail tab edit the Group details. Increase the value of Desired capacity from two to three. You will notice that in few minutes a new EC2 instance will be created.
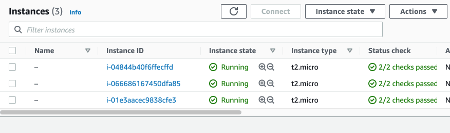
From the EC2 dashboard, you should see now three EC2 instances.
Conclusion
I hope this article helped you to understand how to use Auto Scaling Groups in practice and how it can help you to adapt automatically your application to your workload scaling EC2 instances in and out.

